
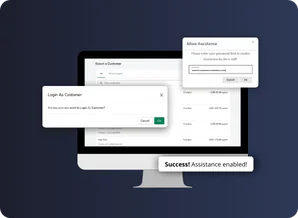
 Live Demo
Customer support is improved significantly with the since you can assist customers with their requests timely. But that's not it.
Shopify store admin is not the only place where you can log in to your customers' accounts from. You can also do that from your CRM or helpdesk, etc. (if they allow you to extend them and run requests to the custom API that comes with our app).
But even this is not the only thing a custom API allows you to do.
Today you'll learn about all the options, along with how to retrieve those API Keys.
Log in to Customer Accounts
You can log in to customer accounts using the Login as Customer API in 2 different ways. However, before that you need to retrieve the Public and Secret Keys.
For that navigate to Apps > Magefan Login as Customer > Configuration > API keys. Then copy and generate corresponding keys.

Once you do that, explore the login options available for you.
Note: the following code is written in PHP, but you can use any other programming language.
Login using the customer ID
<?php
    $publicKey = '****************';
    $secretKey = '***********************************';

    $shop = '**********'; // for example 'myshop.myshopify.com';
    $customer = '**********'; //for example 123456789;
?>
<?php
    $currentDate = date('Y-m-d');
    $token = hash('sha256', $publicKey . $secretKey . $currentDate . $secretKey . $customer . $publicKey);
    $url = 'https://lac.sfapp.magefan.top/api/login?public_key=' . $publicKey . '&customer_id=' . $customer . '&shop=' . $shop;
    /* Uncomment next line in case the multi-pass feature is not available for your Shopify account, it will reset the user password and perform login. */
    // $url .= '&change_pwd_flag=1';
?>

<form action="<?= $url ?>" method="POST">
    <input type="hidden" name="token" value="<?= $token ?>">
    <input type="submit" value="Login As Customer: ID <?= $customer ?>">
</form>
Login using the customer email
<?php
   $publicKey = '****************';
   $secretKey = '***********************************';

   $shop = '**********'; // for example 'myshop.myshopify.com';
   $customer = '**********'; //for example 'jon.doe@domain.com';
?>
<?php
    $currentDate = date('Y-m-d');
    $token = hash('sha256', $publicKey . $secretKey . $currentDate . $secretKey . $customer . $publicKey);
    $url = 'https://lac.sfapp.magefan.top/api/login?public_key=' . $publicKey . '&email=' . $customer . '&shop=' . $shop;
    /* Uncomment next line in case the multi-pass feature is not available for your Shopify account, it will reset the user password and perform login. */
    // $url .= '&change_pwd_flag=1';
?>

<form action="<?= $url ?>" method="POST">
    <input type="hidden" name="token" value="<?= $token ?>">
    <input type="submit" value="Login As Customer Email: <?= $customer ?>">
</form>
Here you'll find the $publicKey and $secretKey values, which you have to replace with unique values you've just copied from your admin panel.
Replace the values of the $shop variable with your shop domain name, and $customer variable value — with your customer ID or email.
Track Who Logged Into Customer Accounts
Note: this feature is available only for Shopify Plus users.
If you want to see which of your admins logged into certain customer accounts, you can do that through our API. It will allow you to see the admin and login time directly on the customer editing page.
Let's see what you need to do to achieve that.
1. Create a custom app
Go to Settings > Apps and hit the Develop apps button at the top right corner. Then click on the Built apps in Dev Dashboard button.
Once in the dev dashboard, press Create app, enter the App name, and hit Create.
Look through the available sections, and specify the App URL and Webhooks API Version. You may leave the Access section empty here, since the access scopes required by the app have to be granted by Shopify.
Then, scroll down and press the Release button. You may also specify the Version name and description for the custom app to streamline internal management.
At this point, you need to reach out to Shopify Plus support and ask them to enable read_users to access the scope of the custom app you've just created. This is an essential requirement to see the admin user and the time when they logged into a corresponding customer account.
2. Get Access Token
Once your app has the necessary permissions, you can install it in your store. Just press the Install app button in your dev dashboard and confirm the installation in your store.
Now, you need to get the access token. For that, ask your developer to follow the Shopify guidelines to send the request to the token endpoint and generate the access token.
The response will be similar to this one:
{
  "access_token": "xxxxxxxxxxxxxxxxxxxxxxxxxxxxxxxx",
  "scope": "read_users",
  "expires_in": 86399
}
3. Enable Login Log
Once you retrieve the token, navigate to Apps > Magefan Login as Customer > Configuration and paste it in the Login Log section.
Hit the Save button, and you'll be good to go and test how the login log works.
Using this method, you'll track admins' activity more effectively and provide better support, whether with preparing shopping carts or placing orders on behalf of customers.


